Registering a Domain
Before you can manage DNS records, you need to register a domain with Strettch Cloud DNS.Important: Strettch Cloud does not sell domain names. You must first purchase your domain from a domain registrar (such as Namecheap, GoDaddy, or Cloudflare). Once you own the domain, you can register it with Strettch Cloud to manage its DNS records.
Register Domain
Click Register Domain. Enter the domain address you want to register (e.g.,
example.com).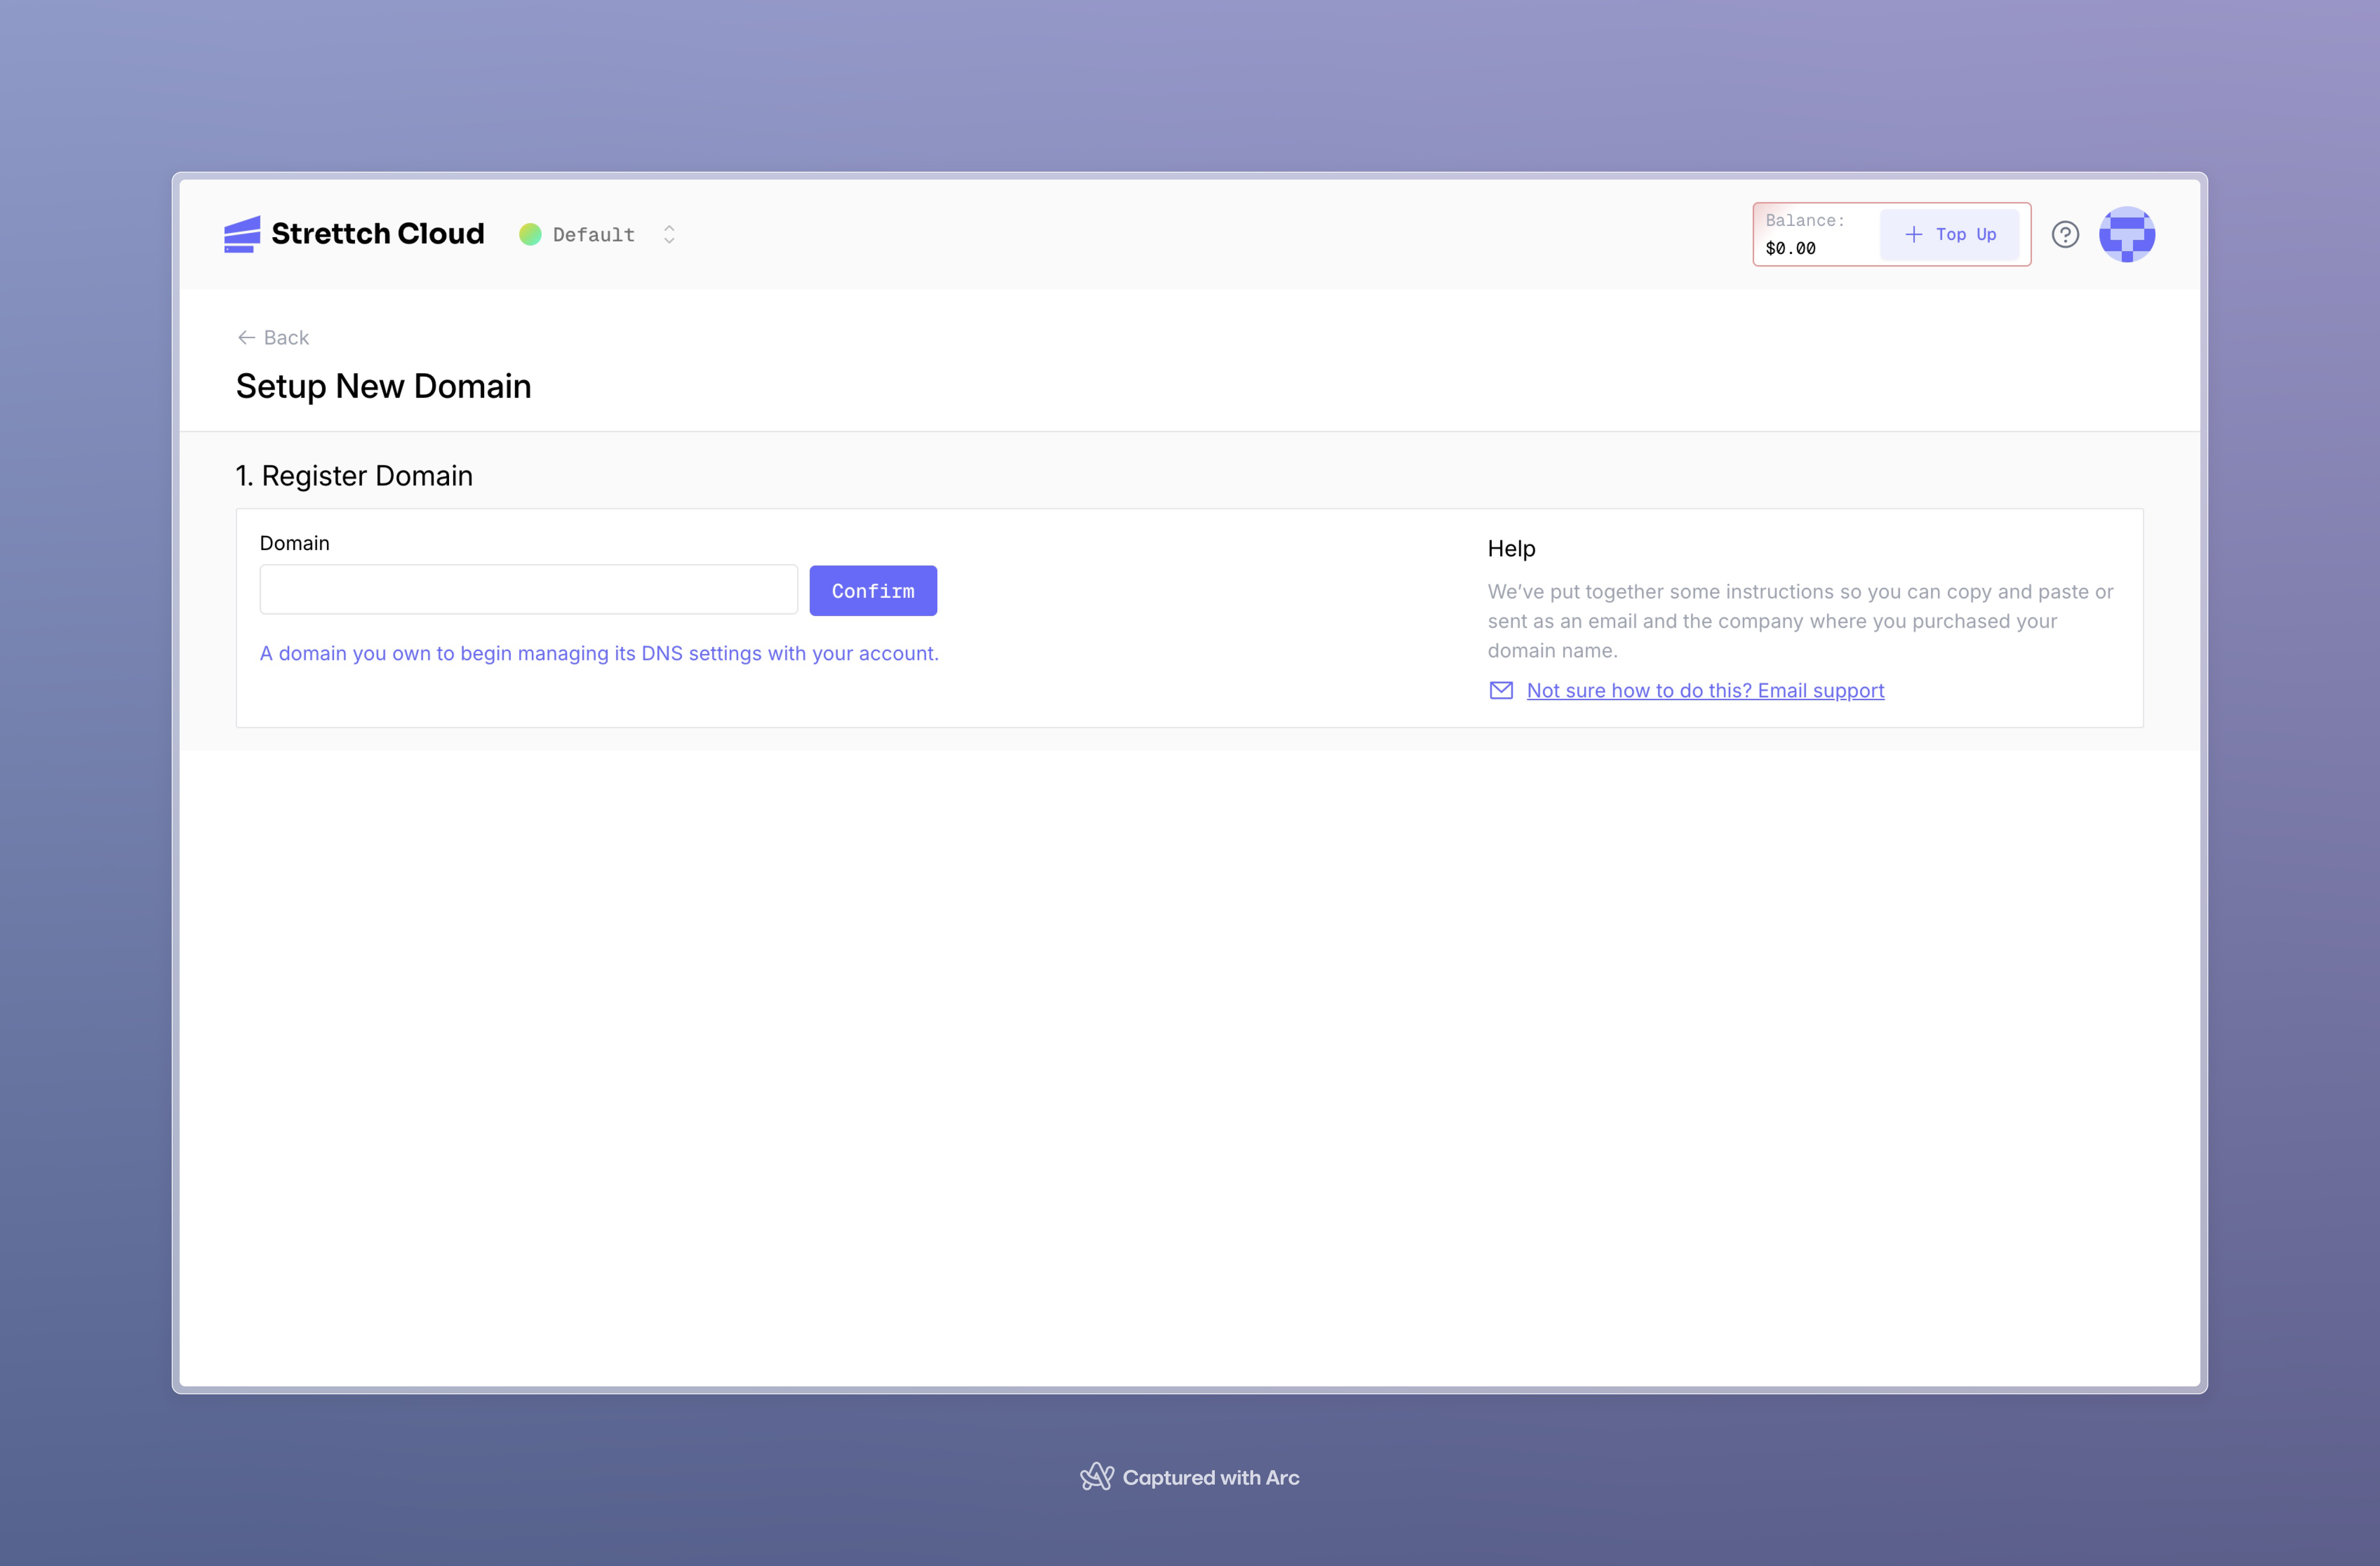
Adding Nameservers to Your Domain Provider
After validating your domain, configure your domain provider to use Strettch Cloud’s nameservers.Copy Nameservers
In the domain setup wizard, you’ll see a table with Strettch Cloud nameservers. Click the copy icons to copy each nameserver: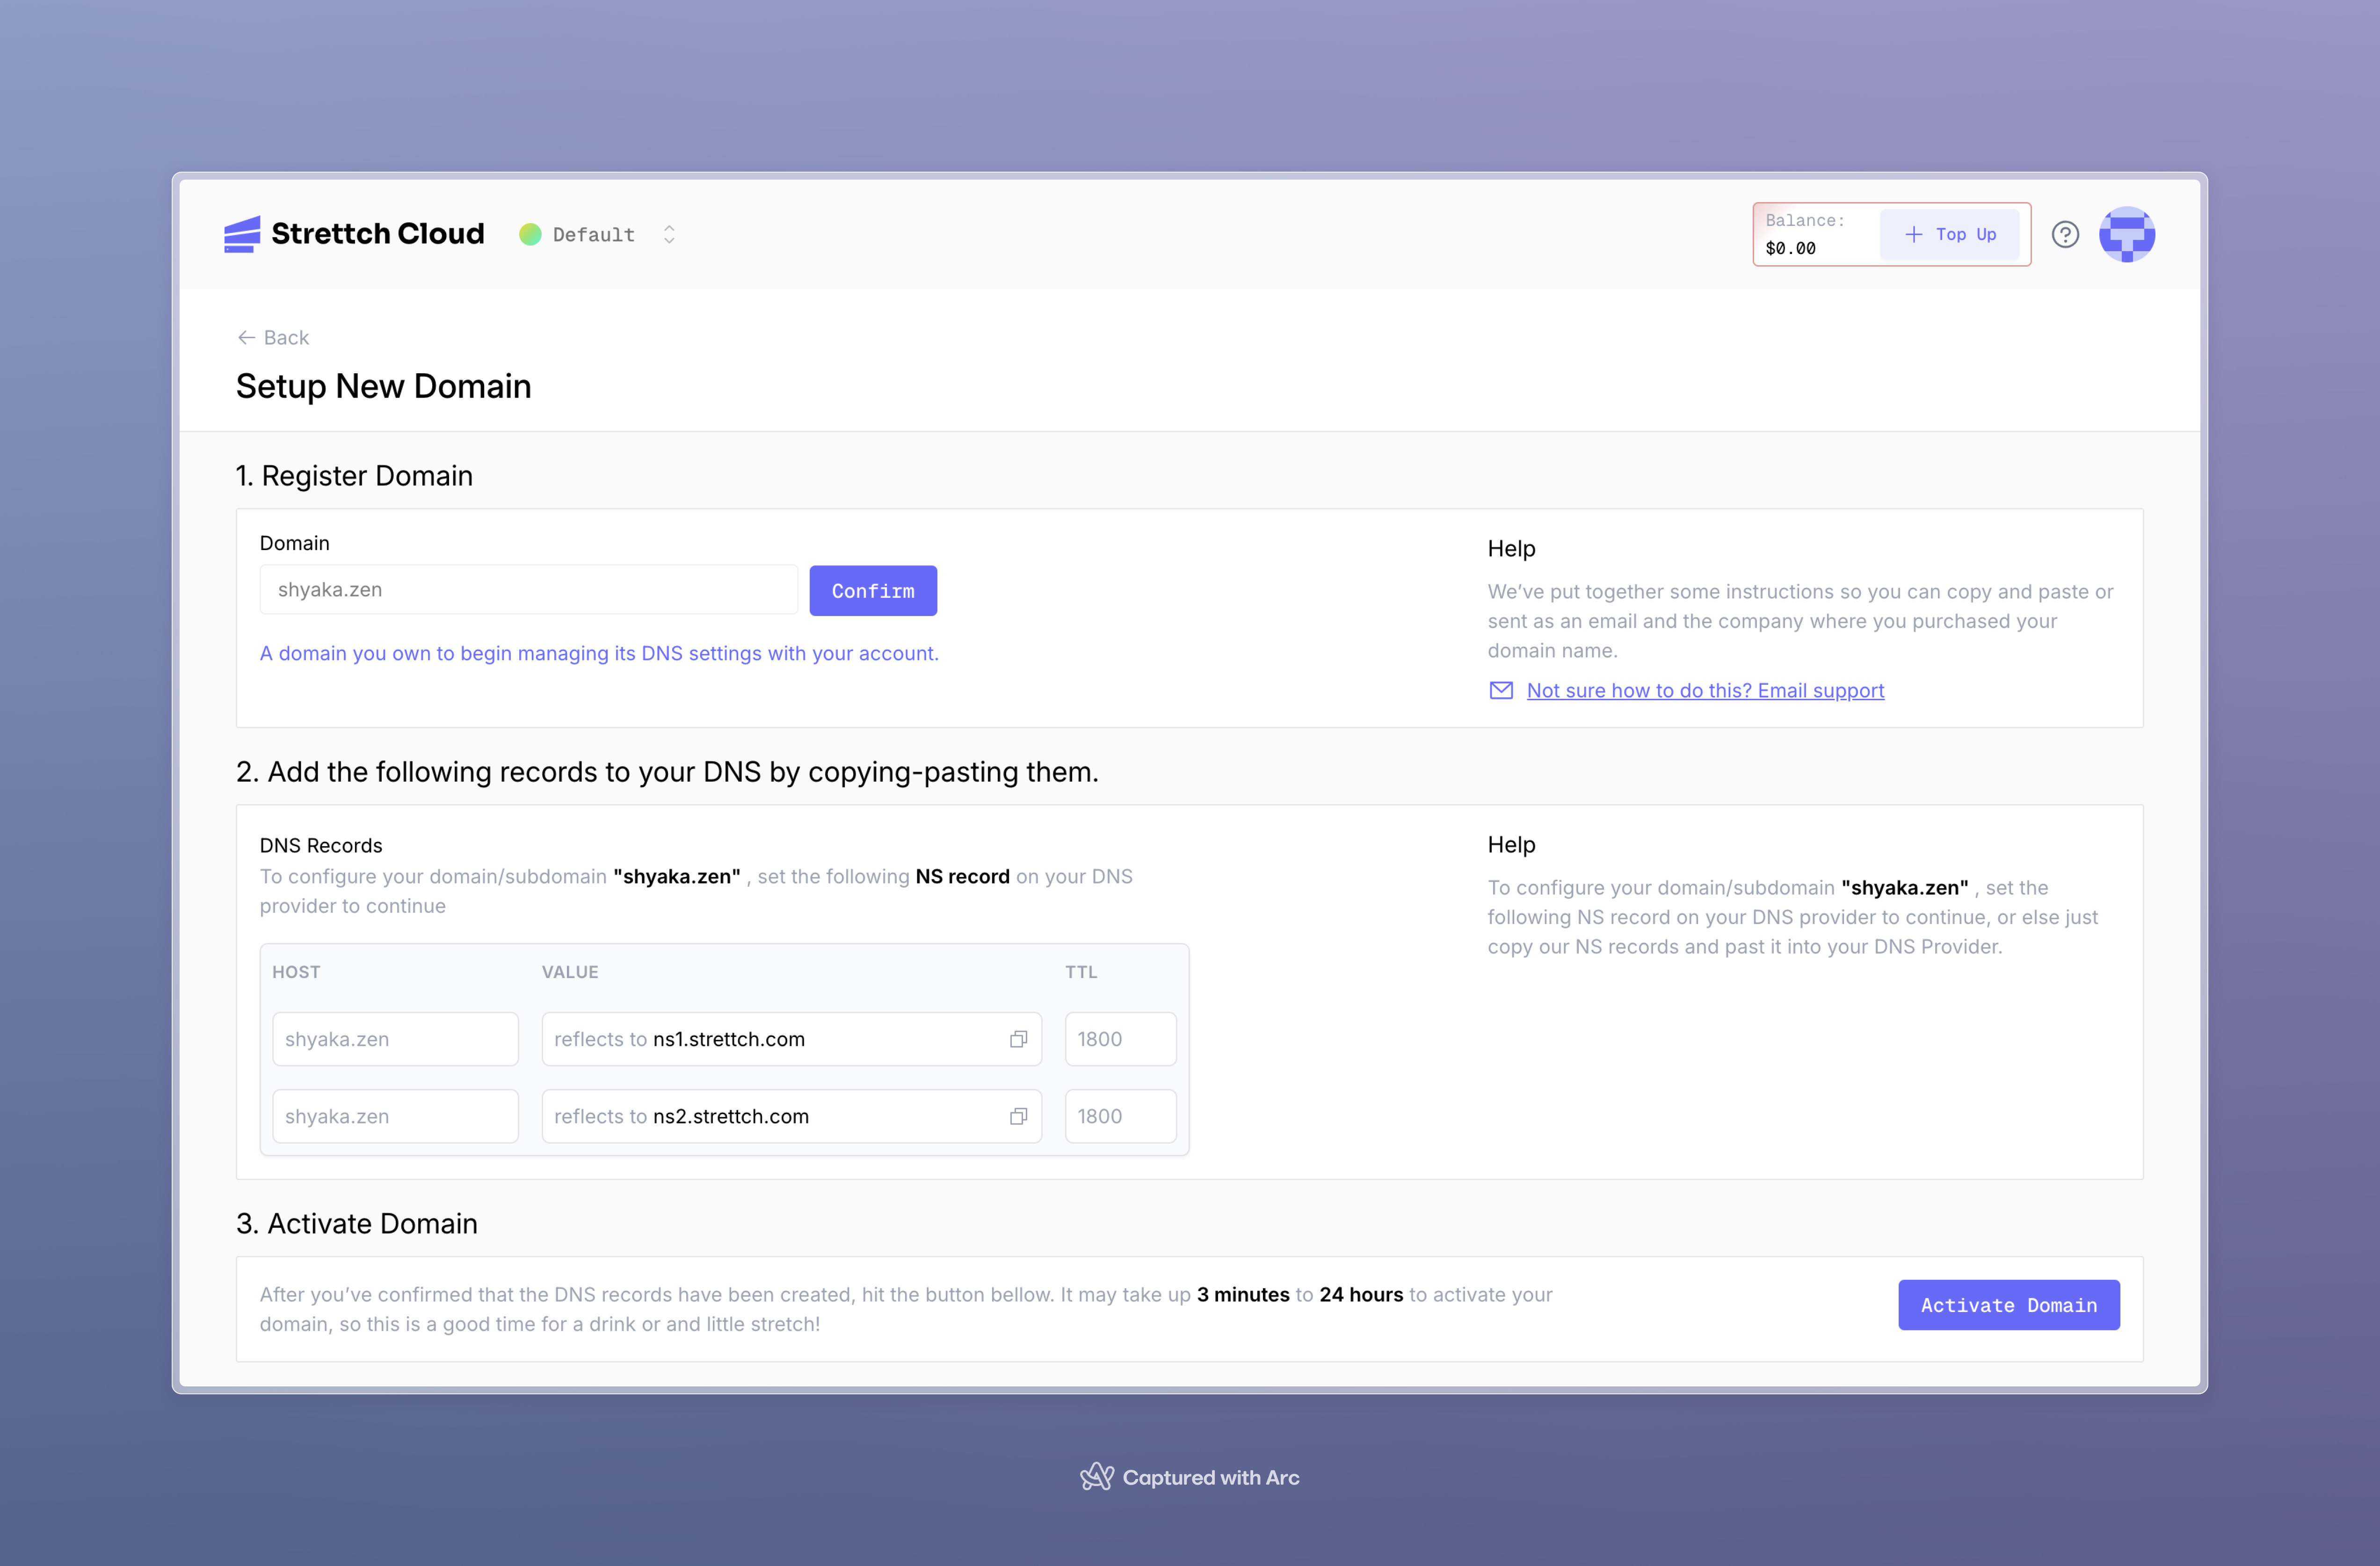
ns1.strettch.comns2.strettch.com
Update Domain Provider
Log in to your domain registrar (where you purchased the domain). Navigate to your domain’s DNS or nameserver settings. Replace the existing nameservers with the Strettch Cloud nameservers you copied.The exact steps vary by registrar. We have detailed guides for popular providers:
Provider Guides
View step-by-step instructions for Vercel, Cloudflare, Bunny, and Namecheap
Verifying Domain Status
After activating your domain, check its status to ensure proper configuration.View Domain List
After domain creation, you’ll be redirected to the domains list for your team. Each domain shows its current status.
Understand Status Indicators
Domain activation can take between 3 minutes and 24 hours depending on your domain provider’s propagation speed.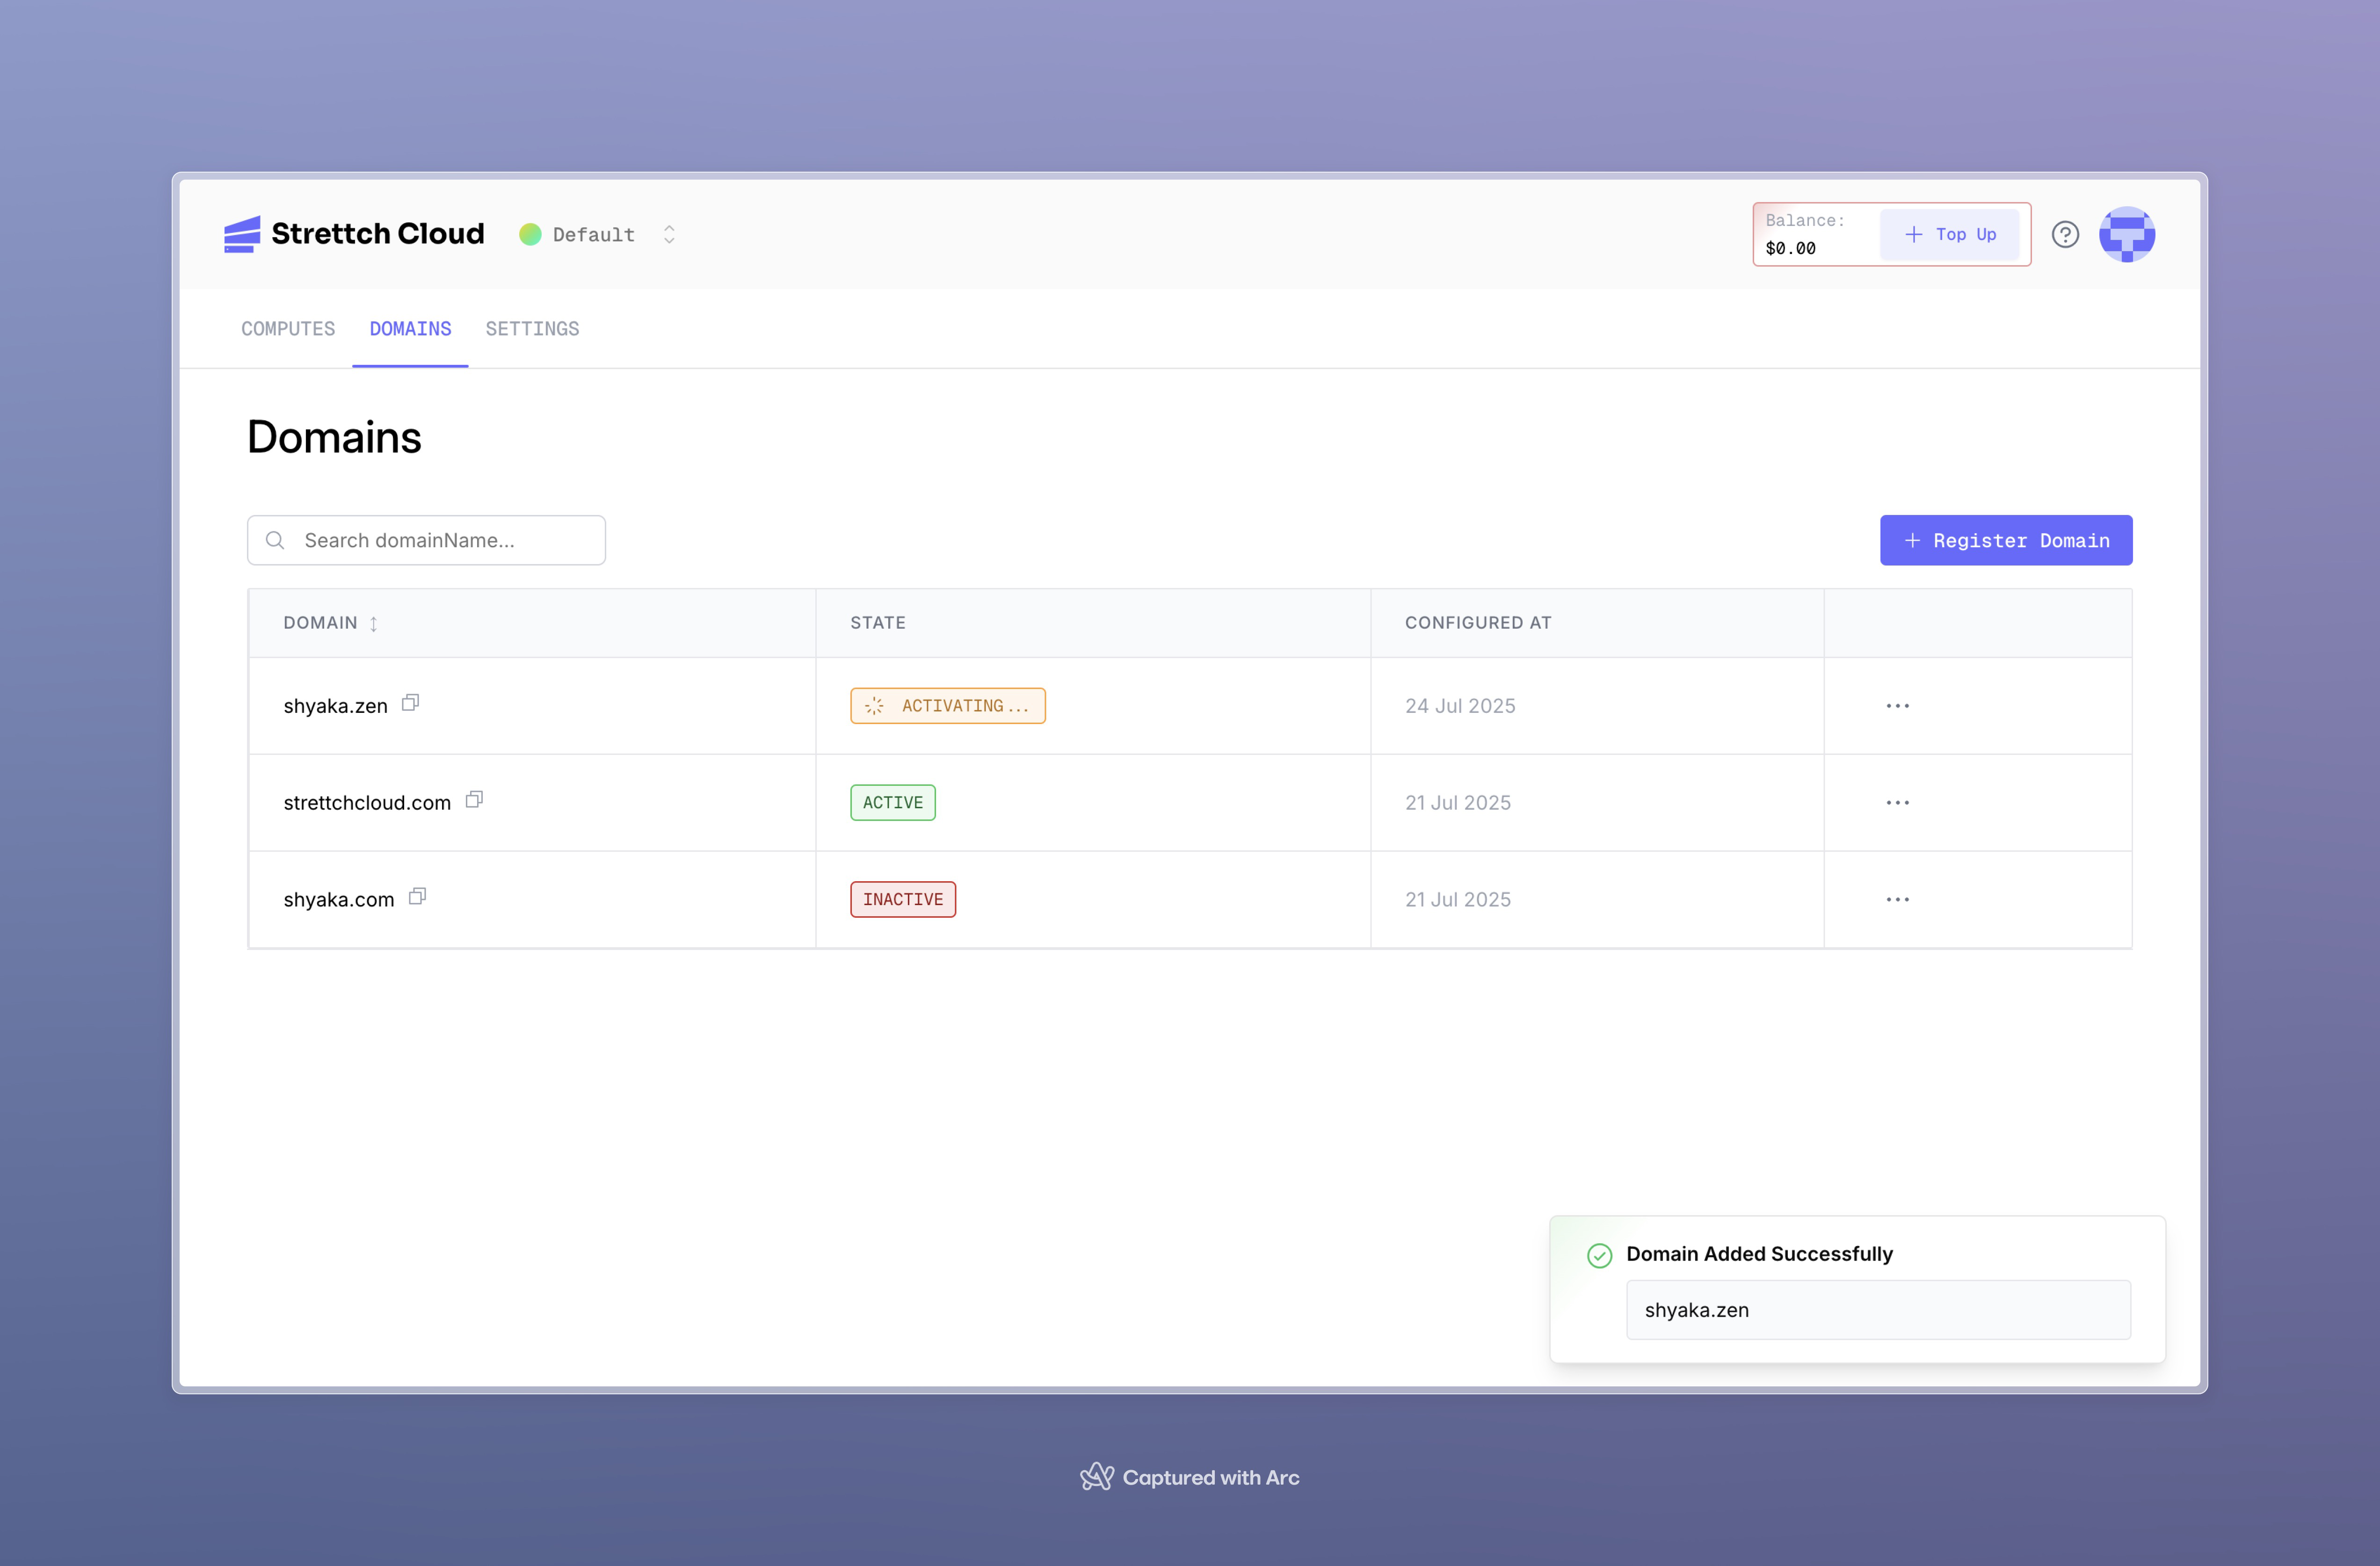
- Activating: Domain is waiting for nameserver propagation to complete
- Active: Domain is fully operational and DNS records are working
- Inactive: Domain failed to activate (nameservers not configured correctly)
Managing DNS Records
Once your domain is active and using Strettch Cloud’s nameservers, you can manage its DNS records.Supported Record Types
Strettch Cloud DNS supports the following record types:| Record Type | Hostname Example | Description |
|---|---|---|
| A | example.com | Redirects to IPv4 address 192.0.2.1 |
| AAAA | example.com | Redirects to IPv6 address 2001:0db8:85a3:0000:0000:8a2e:0370:733 |
| SRV | _sip._tcp.example.com | Service located at 10 60 5060 sip.example.com |
| TXT | _dmarc.example.com | Returns v=DMARC1; p=none; rua=mailto:dmarc@example.com |
| MX | example.com | Mail handled by mail.example.com |
| CNAME | blog.example.com | Is an alias of wiki.example.com |
Adding DNS Records
Select Domain
On your team’s dashboard, go to the Domains tab. Click on the domain you want to manage to open its Advanced Settings page.
Create Record
On the Advanced Settings page, click Add new record. Fill out the DNS Record form with the following information:Name: The prefix or subdomain for the record. For 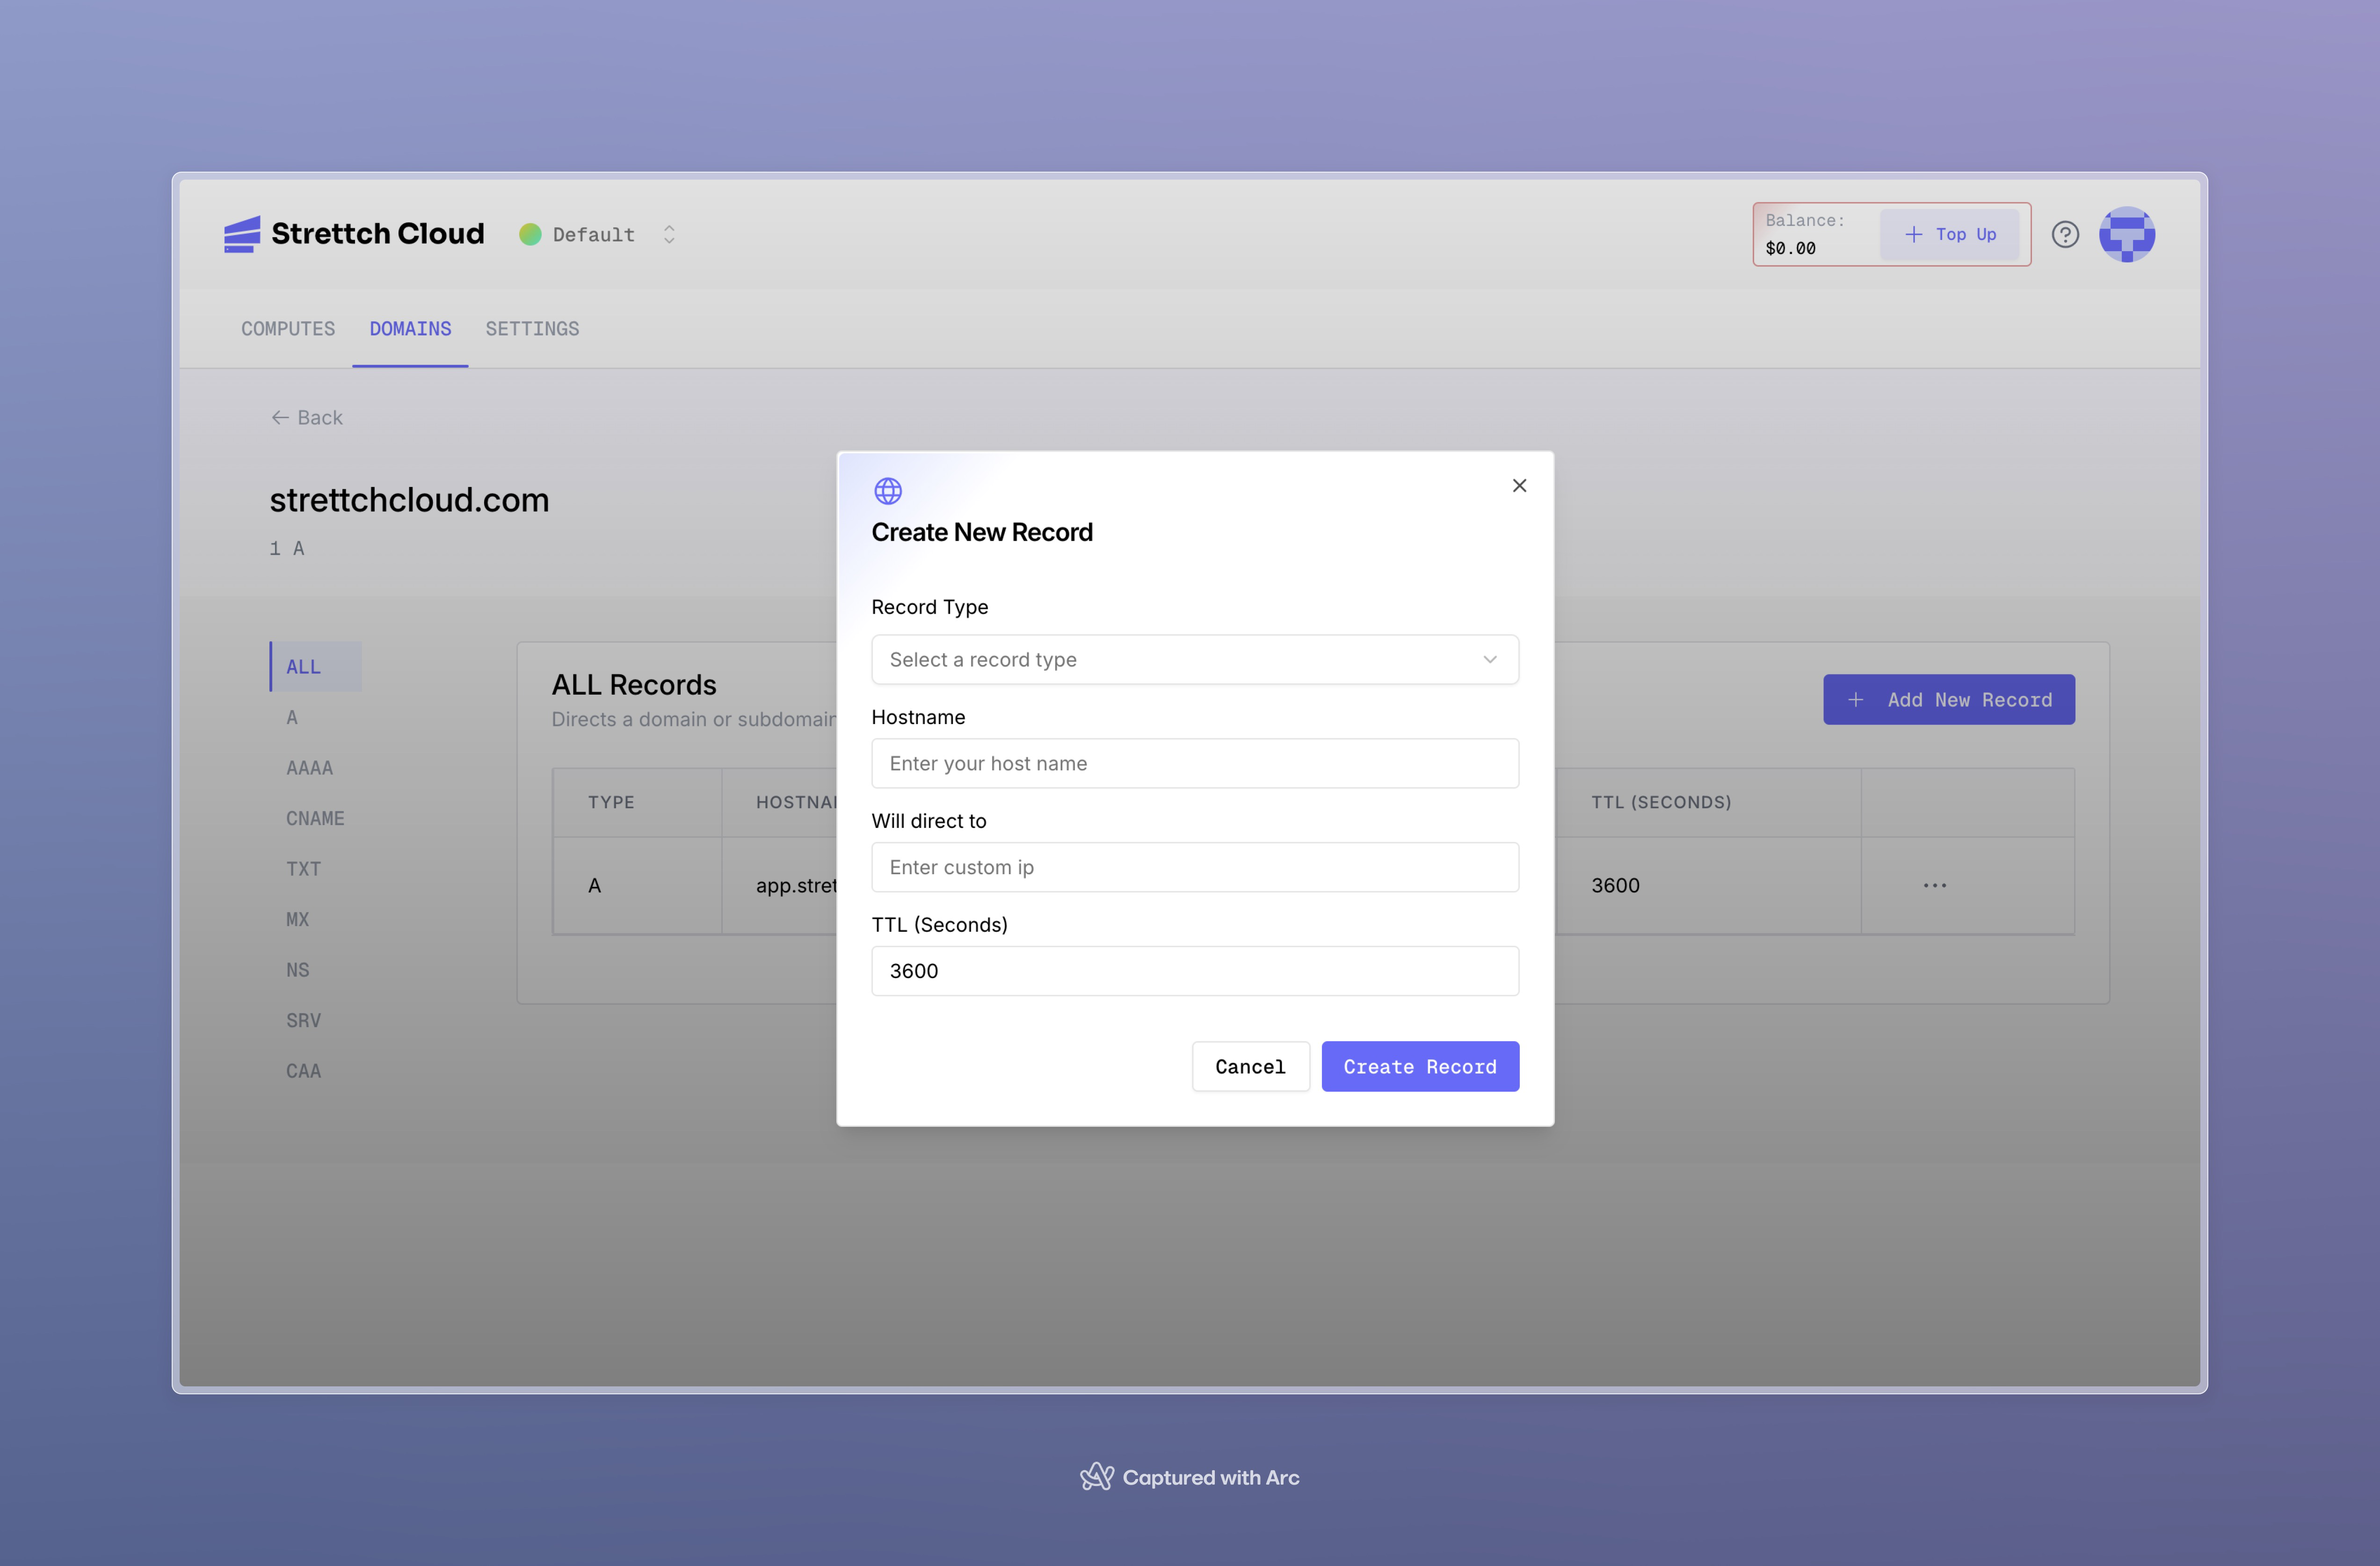
www.example.com, enter www. For the root domain, leave blank or use @.Type: Select the record type (A, AAAA, CNAME, MX, TXT, SRV, or NS).Value: The target value for the record (IP address, domain name, or text content).TTL: Time to live in seconds. Default is 60 seconds. Lower values mean faster propagation but more DNS queries.Comment (optional): Add a note explaining what this record is for.Additional Fields: Some records require extra data. For example, MX records need a priority value.Verifying DNS Records
After adding or modifying DNS records, verify they’re configured correctly. Using Third-Party Tools Use online tools to check DNS propagation globally: These tools show how your DNS records appear in different regions worldwide. Using Command Line Check DNS records directly using thedig command:
+short flag returns only the record value without additional information.
Removing DNS Records
Navigate to Domain
On your team’s dashboard, select the Domains tab. Click on the domain containing the record you want to delete.
Delete Record
On the Advanced Settings page, locate the record you want to remove. Click the ellipsis menu (⋯) next to the record and select Delete.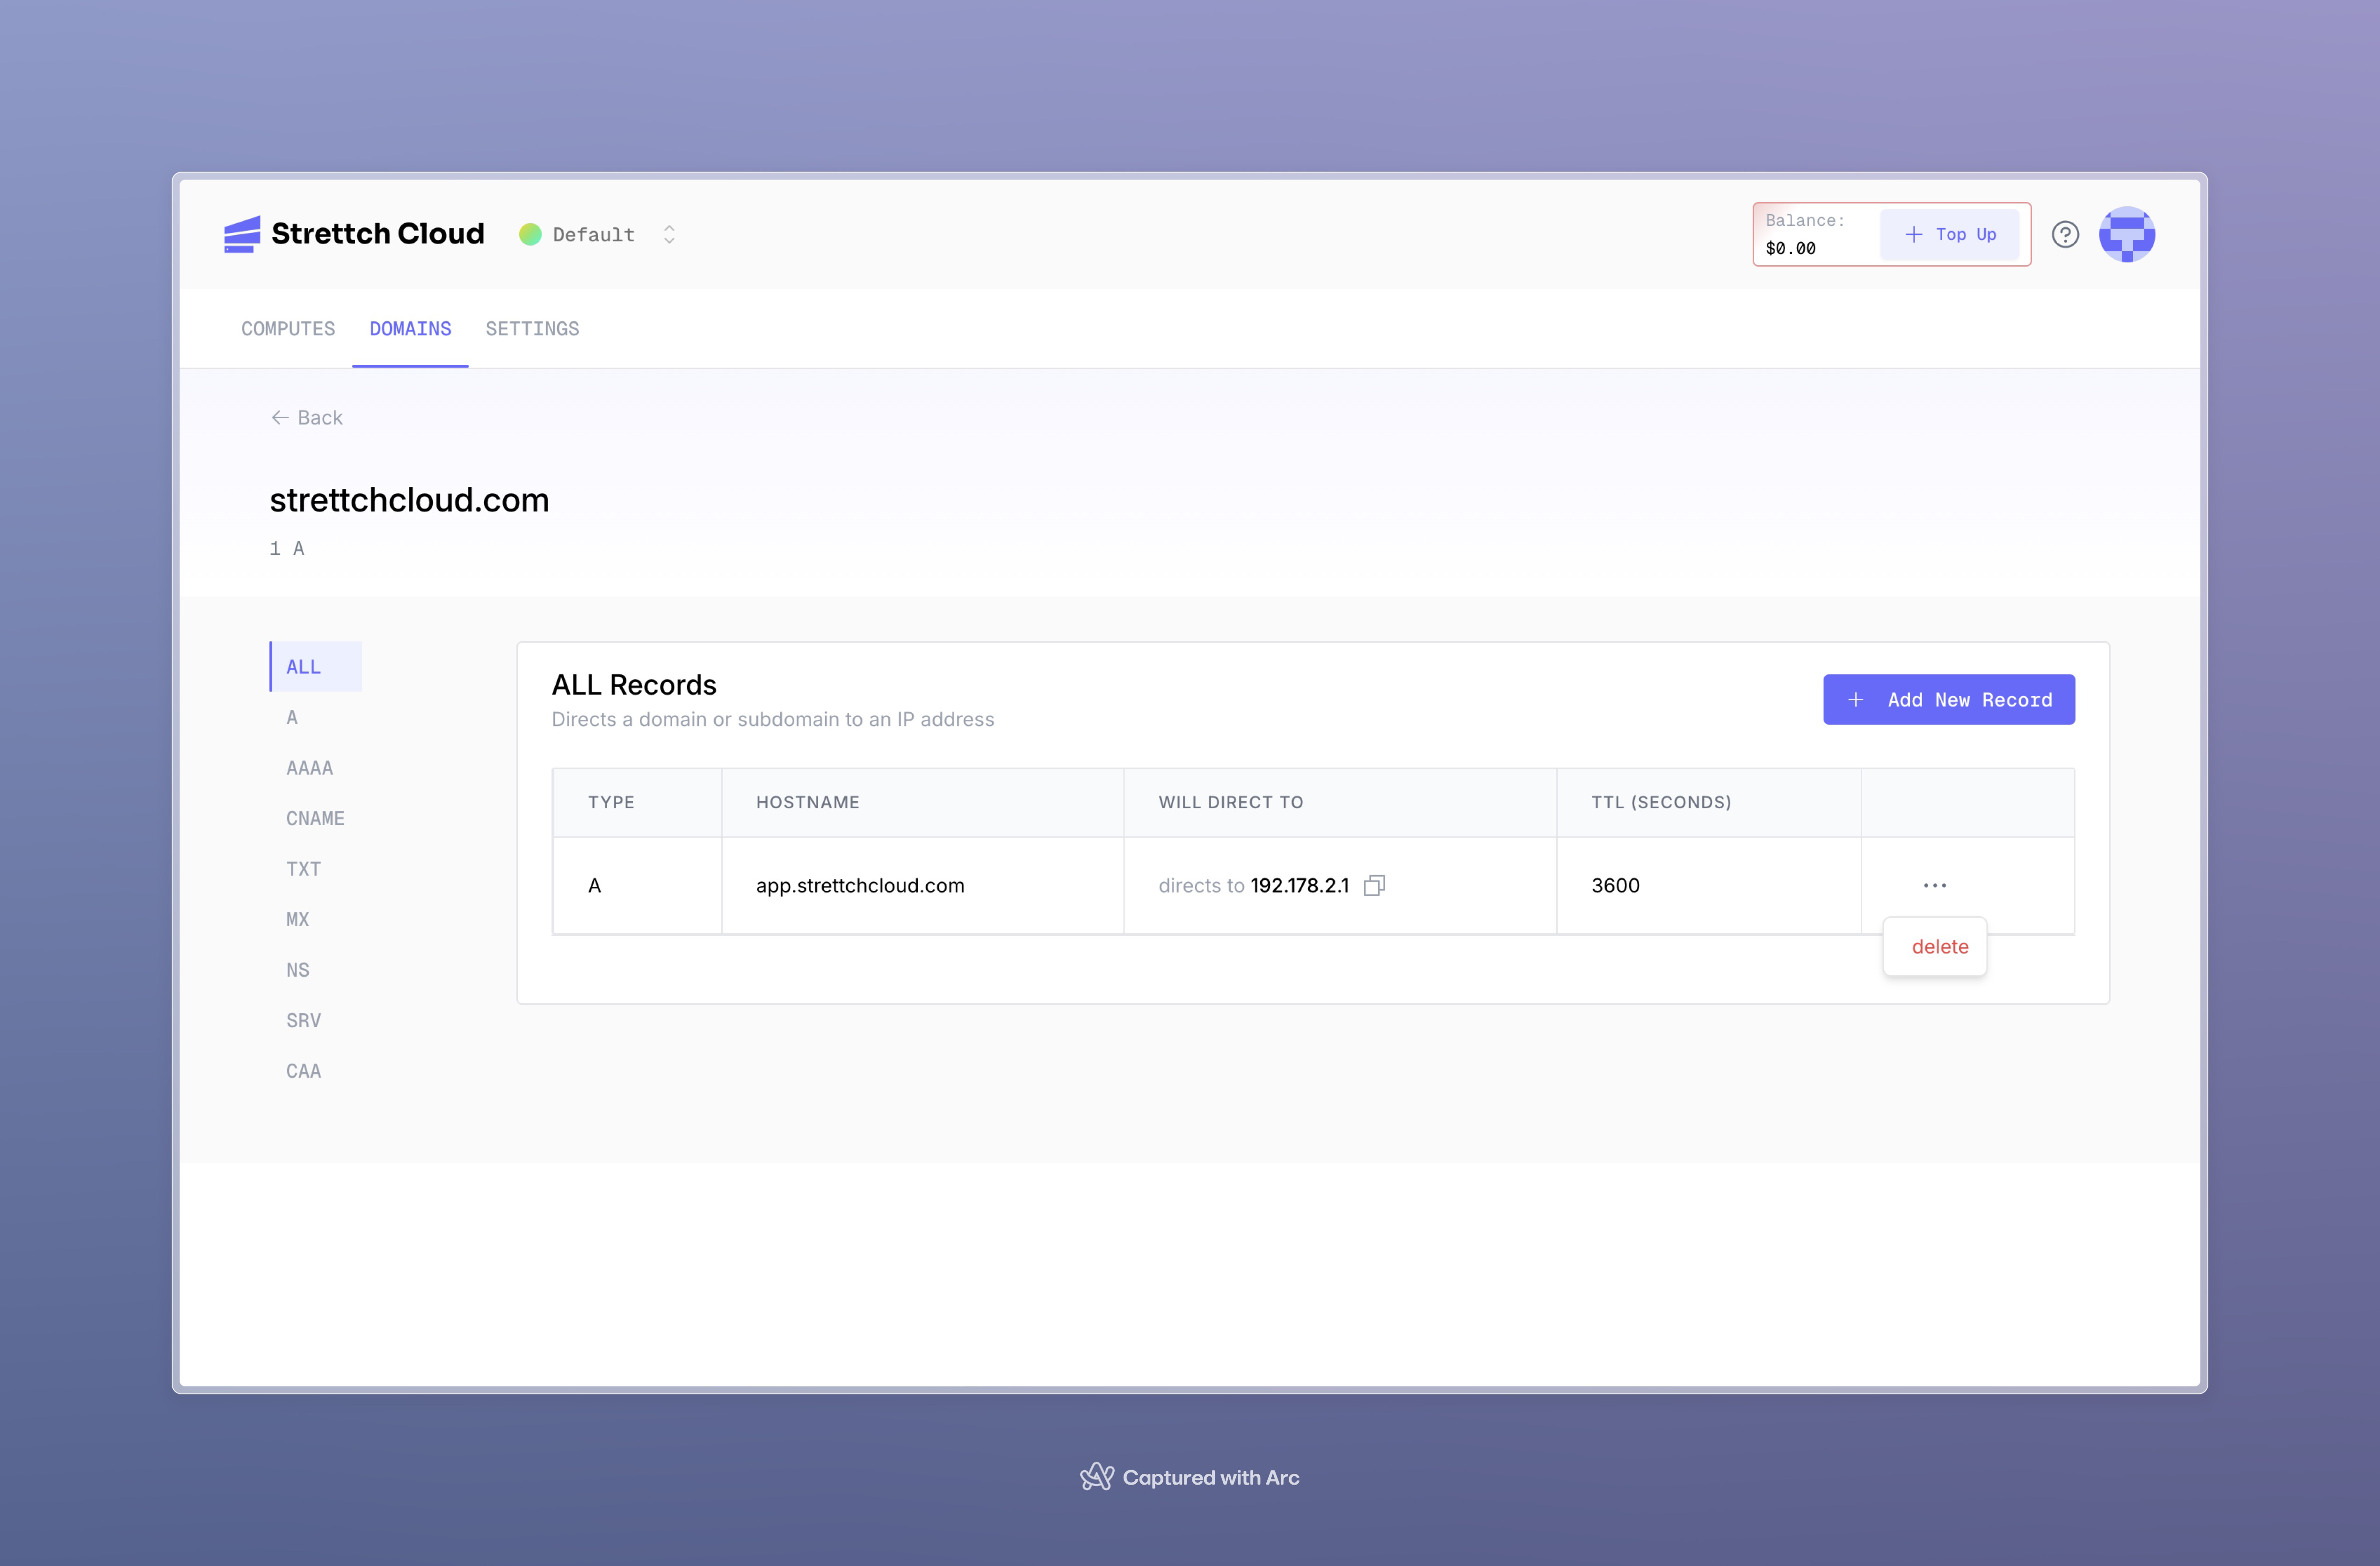
Next Steps
DNS Overview
Learn about DNS concepts and how Strettch Cloud DNS works
SC Compute
Deploy applications and connect them to your domains
Need help? Contact our support team or visit cloud.strettch.com.